Thursday, June 24, 2010

Learning GIMP Progress

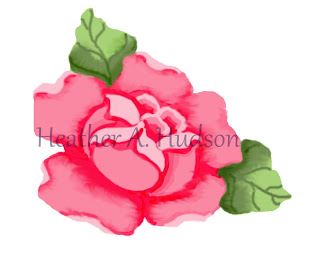
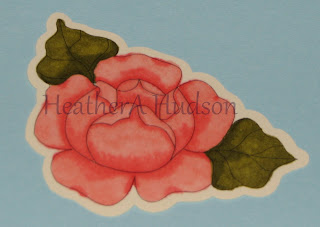
This is the first little Rose that I drew and painted with GIMP. I love it. I really didn't know what I was doing, but figured the only way I would be able to figure out what I was doing ...is to just do something...lol. I did print a bunch of these out and antiqued them...they look awesome!
The rose below was done to use at the top of a tag. When I made it...I was having trouble with the palette. So maybe now that I have that figured out.....I will go back and fix it. Luckily I saved it in layers....so I can just change them! There is some pretty scary blending going on there...lol (or lack there of).


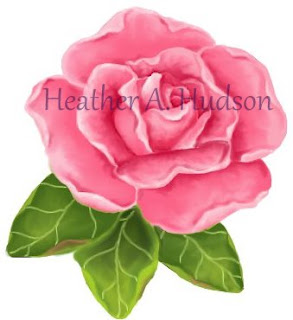
This was my second attempt of playing with GIMP. I really like it too. I just couldn't figure out how to save the colors I was using so it took quite a while...having to search for the colors again and again. My DH showed me how to make my own palette and I started on another rose...only to find out that GIMP doesn't have an auto save. So after spending an hour on a painting...it was lost due to the program deciding to close...lol. Lesson learned ...SAVE your work...lol.
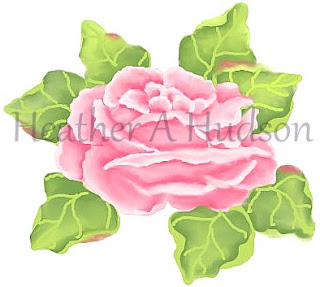
The following rose was my third rose. I really like the colors on this one. Luckily I was able to save my palette....so I could use it again. Painting on the computer is much less messy (-: It still takes a long time...but there isn't any cleanup.
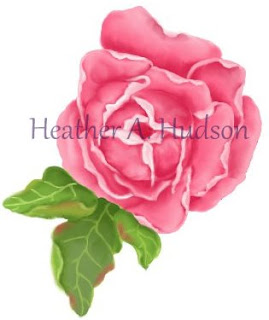


Here is GIMP Rose #4. I love it too. I learned this time how to change from gray scale to RGB. Every time I started to paint...shades of gray would show up. Of course my DH (Pete) helped me out with that. I hope with my next practice rose...to use the layer option more....so that I can practice background colors. Fun, Fun, Fun! Have a great day!


Sunday, May 23, 2010

Stamps I made using Speedy Carve by Speedball

Here are some stamp images that I made using the Speedy Cut or Carve (can't remember which one)...otherwise know as the "Pink Stuff". I carved these out and stamped them on plane white paper....and just tinted the whole image so you could make out the stamps.

Thursday, May 20, 2010

Cut on my Silhouette

Here are a few more little embellishments that I made using my new Silhouette Digital Die Cutting Machine, Printer and Copic Markers. This image I printed out on light pink card stock (avalue pack of card stock from JoAnn's called "Botanical"). It has light pink, dark pink, beige, light and dark green.

This print out was on Dark Pink cardstock and colored with the Copic Sketch Markers.
This one was printed on beige card stock and colored with Copic Sketch Markers.

This one was printed on light pink card stock, cut on my Silhouette Digital Cutting machine and colored with the Copic Sketch Markers.

Tuesday, May 18, 2010

For Marybeth

Hello Marybeth.....Here is the garden art piece that I have. You can see (kind of) how the piece screws into the adapter at the end of the vase. I love how yours looks like a flower.

I colored two more Tags

When I got home from running errands, I decided to color another set of tags. I like these even better :-) They were made the same way as the ones I posted earlier today..just colored differently with the copic sketch markers.


This is the second journal tag. I did some in other colors...but didn't like them...LOL

What I created today with my Silhouette and Copic Sketch Markers


After many trials and errors....I was finally able to come out with this tiny button on my Silhouette Digital cutting Machine. The line drawing of the rose was done by hand, then traced in Ink Scape, then put in Robomaster I added the scallop on the outside and then printed on our printer. Then I put the sheet into the Silhouette Digital cutting Machine, and it cut out the Scallop shape (I had to go into Robormaster and delete everything inside of the scallops, or it would of cut out everything). Copic Sketch Markers were then used to color the outside border pink with darker pink polka-dots, and to color the rose and leaf.

Here is a matching tag to go with the button. The same Rose was used, but once the line drawing was placed into Robomaster I made the tag shape using rectangle, oval and circle shapes. I also added the journal lines here as well. Again I printed (black) it out on the printer, then used the Silhouette to cut it out (again I had to delete all inside images or they would of been cut too). I then used Copic Sketch Markers to color in the edge with pink and added darker pink polka-dots. I used the Copic Sketch Markers to color in the rose and leave as well.


This is a photo of them on a light blue background.

Have a great Day!

Sunday, May 16, 2010

Baltimore Oriole


I was finally able to get a picture of the Baltimore Orioles that we are lucky enough to have in our yard. They make the most beautiful music.


This male was singing way up in our trees. He was so far up I didn't think the photo would come out. I was able to crop it, and was happy with the photo.

My Images Cut by Silhoutte

The above original was drawn and colored using Derwent Watercolour pencils. Drawn on plain white cardstock. The image on the right was printed on plain white cardstock, then cut using the Silhoutte Digital Cutter.

The original image here was done the same way as the first picture I described, but I made it into a sticker using my Xyron Sticker maker.

The original image in this photo was done using Copic Sketch Markers. The image on the right was printed on plain white cardstock and cut using the Silhoutte Digital Cutter.

Now I have to learn how to clean up my images that I have drawn, painted etc (Pete cleaned these up), so that I can cut more of my own images. So far.....I am loving the Silhoutte! I am off ....need to get my flowerbeds weeded...and plant some flowers! Have a happy day!

Monday, May 10, 2010

Mother's Day Gifts

The boys made me some awesome flowers out of tissue paper....and some out of Crayola Modeling Magic. They were awesome! I will get pictures soon and post them. Pete got me the Silhouette digital cutting machine! I can't wait to read about the software and give it a try! This machine will allow me to print out images that I have painted or drawn.....and cut them out! I LOVE it! I will let you know how much I really LOVE it when I actually use it!

As usual my gift for both my mom (Shirley) and my dear MIL (Margaret) were not finished in time. But that is just how I roll. I started my mom's album ....and even had a few pages finished (posted as 5x7 scrapbook page). Then I was watching You Tube and found something that I just had to make! A Paper bag mini (my case it will be chunky) album. I started that on Thursday Evening. I was so excited about it....that I put the other album on the back burner. Friday evening I worked on it a little more over at Ginny's house. Of course I worked all day Saturday and had to clean and cook (Pete and the boys helped too). I was able to get 6 photos in the paper bag album...but I took the photos before that. I will post the shots I took below...so you can see where they started....and how they end up (when I finish...lol).

Paper Bag Mini Album
Here is the inside left cover and first page. I used a premium paper stack by K & Company (I will get the name later). I attached it to the small natural lunch bags. I inked / grunged the edges of all the pages, tags and photo mats with Ranger distress ink in vintage photo. I used a Fiskar's scalloped punch to create the opening at the end of the bags (so it is easier to grab tags). I chose earthy tones...and just love it (and it is not even finished yet). I will have to post more pictures later....I can't get the "add Image" to actually work...LOL.

This is the first pages, you can see the punched out scalloped area much better. After the edges of the photo mat was grunged, I stamped it with a stamp from Inkadinkado and (tba) ink pad.


This is the page opposite of the one pictured above. The blue with the butterfly flips back and forth (just like the big pages...it is just smaller) and you can see that I actually have a tag sticking out of the blue little pocket. The tags were made on my cricut machine using the sentimentals cartridge and the photo mats were made with the (tba) cartridge.

This is a shot of the other side of the blue small pocket with the butterfly....and the other side of the short tag.

Another photo mat and pocket that will hold a tag.

Here is another set of pocket pages. The circle photo mat (and all the square mats) has pop dots behind it....so it sticks out from the page, and it was stamped with the same stamp I used earlier. I will put some kind of decorations on the opposite page. You can see the small pocket sticking straight out in the center.

Here is the small pocket with the tiny tag.


This photo mat was stamped with a beautiful bird image.

Tiny pocket with tag and the larger pocket.
(the colors are richer than they appear in this one photo)

This is the last page and inside back cover. I used Ranger Grunge Paper for the cover which I have not finished yet.

As soon as I add some special touches and the rest of the photos...I will repost the pictures. Thanks for looking! Have a great day.

Mother's Day Cake

The Mother's day menu was great here! For dinner we had honey BBQ chicken, shrimp, red peppers, onions and mushrooms. Broccoli and Cauliflower salad, baked beans and homemade bread. For desert I made a yellow sponge cake with homemade pineapple filling and butter cream frosting. I also made strawberry Jello and pretzel salad (my fav). We enjoyed the day with both my and Peter's parents!

Friday, April 30, 2010

The Last minute gift

Here is the last minute gift that I made for Caleb's teacher. Caleb informed me on Wednesday (when I was finishing Gabe's Birthday cake) that his class was throwing a surprise baby shower for Mr. Mortenson on Friday. Thursday morning I ran out and bought a couple of books for Caleb to wrap. Thursday evening I began to fill guilty because I have all this scrapbooking stuff sitting here at the house....and yet I have done nothing with it. :-) At 9:30 pm I decided that yes....I would attempt to make a simple photo book as a gift. Of course Mr. and Mrs. Mortenson don't know if they are having a boy or a girl, so I just stuck with neutral/Manly colors...lol...since it was for Mr. Mortenson to carry around.
On the cover I used the Cricut Cartridge Plantin Schoolbook to make the tags. The paper was from the K & Company Small Wonders Designer Paper Pack. (FYI...somone...meaning Ginny...needs to give me some praise because I got off my bottom and went through all my stuff to see what paper/cartridges I used).
I also used Black Textured card stock from DCWV Neutrals. The Cricut Cartridge Accent Essentials was used for shapes on the pages. I wanted to use something that would work out well with a square photo (no one has problems cutting a square out of a picture...at least I think). I wanted to make sure they were big enough that the focus of a picture would fit in the squares....and then have a scalloped edge.
The stamps I believe were by Inkadinkado...but am not sure...because I took all my stamps out of their packages....I didn't label who made them (sorry). They were just cute little baby stamps.
Archival Ink in Jet Black by Ranger (I love Ranger products)!
The lettering was done with Creative Memories Bold Tip markers that are older than Gabe (lol). They have a chisel edge so the writing can look like calligraphy.

The chipboard book that I used and the ribbon/fibers were purchased from Michaels dollar bins. Got to love a deal. Unfortunately I didn't have any other colors that matched...or I would of put a lot more stuff on the rings. I worked on this book from 9:30 pm till 11:00pm. Just like all my painted gifts.....this too was last minute. Thanks for looking!

XOXO to my BFF Ginny....because I am just now posting this (should of finished posting it last week), because she asked about it....and reminded me.

Tuesday, April 27, 2010

Gabe's 10th Birthday Cake


The Cake
This year we got into watching Cake Boss. Gabe decided that he wanted a "Wedding Cake" for his Birthday cake. He wanted tiers. I went out and bought some Fondant....and ended up using it once I read a lot of reviews that most people peeled off the fondant because they didn't like it. While on line I found a recipe for Modeling Chocolate. Instead that is what I ended up covering his cake with. It could of come out better...but this will do for a first try. Caleb helped put on the green sides and did all the light blue spheres at the base of the cake. I had intended for it to be one of those topsy turvy type cakes ...but when putting on the second layer...I had had enough of baking bake. Hello there are only 8 people eating it...LOL. It is a lot of cake! The 2nd layer I should of made the circumference smaller, but oh well. Gabe loves it! When he got home (there was only green on the side and the first layer)...he was thrilled. "More than he expected" he said. LOL Guess his expectations are not as high as mine are...LOL. Either way both the boys had fun (me too) putting this together.

Thursday, April 22, 2010

Last 5x7 for the night

Gabe 5x7
Well....I had to go to the gas station to get gas....lol...and got home and did this last sheet. What I have learned is that for now on I shall emboss first....then add the pictures. Even though I took care when Embossing...I ended up getting a blister in the top left hand corner ....hence the two pieces of bling. I just went on and added some simple bling to the rest of the page. Now I will probably go back to the other pages and do the same. I figured out the blister thing on Caleb's photo (which I have not posted yet)...and knew to be careful on the next pages. Unfortunately I just couldn't get the leaves to gloss up....and that is how I got too much heat which ended up causing the blister. Gotta run...up early tomorrow with the boys and then doing my 3 (13 hours each) work shifts! Hugs and Kisses to all!
By the way...I was able to get the protective sleeve over the page :-)

Another Page

Another 5x7 page
Here is another 5x7 scrapbook page that I did using the Cricut and my own stamps to emboss. I love this picture of my boys with my dad. I wanted to make sure that the photo was the main focus of my page. I did some embossing with black on the striped paper, and embossing with transparent on the black background. This photo will also be put inside of a protective sheet (it covers front and back page...so no dimensional items) and placed in the same Creative Memories album as the other page. As soon as I have more pages done, I will post them!

I am so glad that Ginny is opening a Scrapbook store...and got me into playing with paper! I can't wait to make some mini albums that I can fill with flowers....bling....stamps....fibers....and of course photos!

5x7 Scrapbook Page

Finally a 5x7 scrapbook page
I finally got around to finishing a scrapbook page! I love it! I used PICASA to change my photo to black and white, GIMP to size it and had my DH Peter print it out for me. I can't wait to figure out how to use the Sure cuts a lot program so that I can make my own images to cut out on the Cricut (that was the only reason for buying the Cricut...so I could cut out my own images). It is a pain only being able to use a scalloped square...when you want a rectangle. The day I figure out the program (actually I haven't even looked at it yet...lol)....will be a happy day. I did use the Cricut to cut out the background shape, the layers under the photo, the tag and key. I used Ranger distressing ink on the tag and embossing powders on my stamped images. This page will be covered with a plastic sheet protector and put into a 5x7 Creative Memories album that I bought before Caleb was born (hence no bling or flowers, or dimensional items).
The stamped/embossed images on this page are a result of my dabbling in Stamp Making (just add stamp making to another media that I have chosen to like...lol). I made these myself using Speedball speedy carve sheets. I was lucky and bought them at a garage sale last summer for $1.00 a piece...both sets including the tools. I found two sheets on Ebay for $5.00 each, and $4.00 to ship (most places want to charge $15-$17 to ship.....yikes).
I have another page to post too.....it will be on later.

Wednesday, March 17, 2010

Think Spring

I am so excited! It has been sunny two days in a row. Now I will admit it is still pretty cold out, but who cares....it is SUNNY! I am way more productive in the spring. At least I think so...LOL.
Yesterday I had a lot of fun. Spent the day with my BFF Ginny. She will be opening a scrapbook store soon in our area. We went out to the future space of Polly's Paper Studio and did a little measuring...and dreaming of where all the fun stuff will be going!

After hanging out at the new area, we went back to her place where we looked over all her new bling, paper, stickers, and chipboard. She has all the beautiful stuff.....just waiting to open her store!

Last night I did a little decorating of my Ikea Magazine files and hope to work on them a little more tomorrow.

Saturday, March 13, 2010

Bethany's Graduation Album

This is a 12 x 12 scrapbook album that I purchased from Joann Fabrics. I painted this using Delta, Americana and Folk Art Acrylic paints. I gave it as a graduation gift. I liked it so much, I bought another two. I love the polka dots with the pink roses! Sometime in the near future I want (there is that word again) to paint my other albums and actually do some scrapbook pages inside!


Pink and Red Roses

This past January my best bud Ginny talked me into making a "Thank You" card for a friend of ours. Ginny has always been the "Queen of Cutting Paper". That was the first time I got to use her Cricut die cutting machine. I liked the card so much, I kept it...LOL. (I will make you a new one Annie).

On my birthday, Ginny and I went to Joann's, Michaels and our local scrapbook store. We bought some scrapbook paper (I didn't buy much)...because I was still not hooked. Then Ginny showed me one of her Beautiful Chipboard books she had designs. It was made with beautiful paper, bling and ribbon....too fun! That is when I decided that I would have to try Scrapbooking (again)!

Ginny showed me a site www.scrapbook.com. I spent some time looking at everyone's scrapbook layouts, books and scrap rooms! That lead me to Youtube where I started to check out all the different tools that scrapbookers use. Since then I have made many purchases. I have purchased stamps, stamp pads, paper, a cricut, bling and prima flowers. There are many things I would still like to get.

The pictures here are just some of my artwork that I would like to make into die cuts, stickers and journaling cards. I would love to be able to use my own artwork in my scrapbooks.